
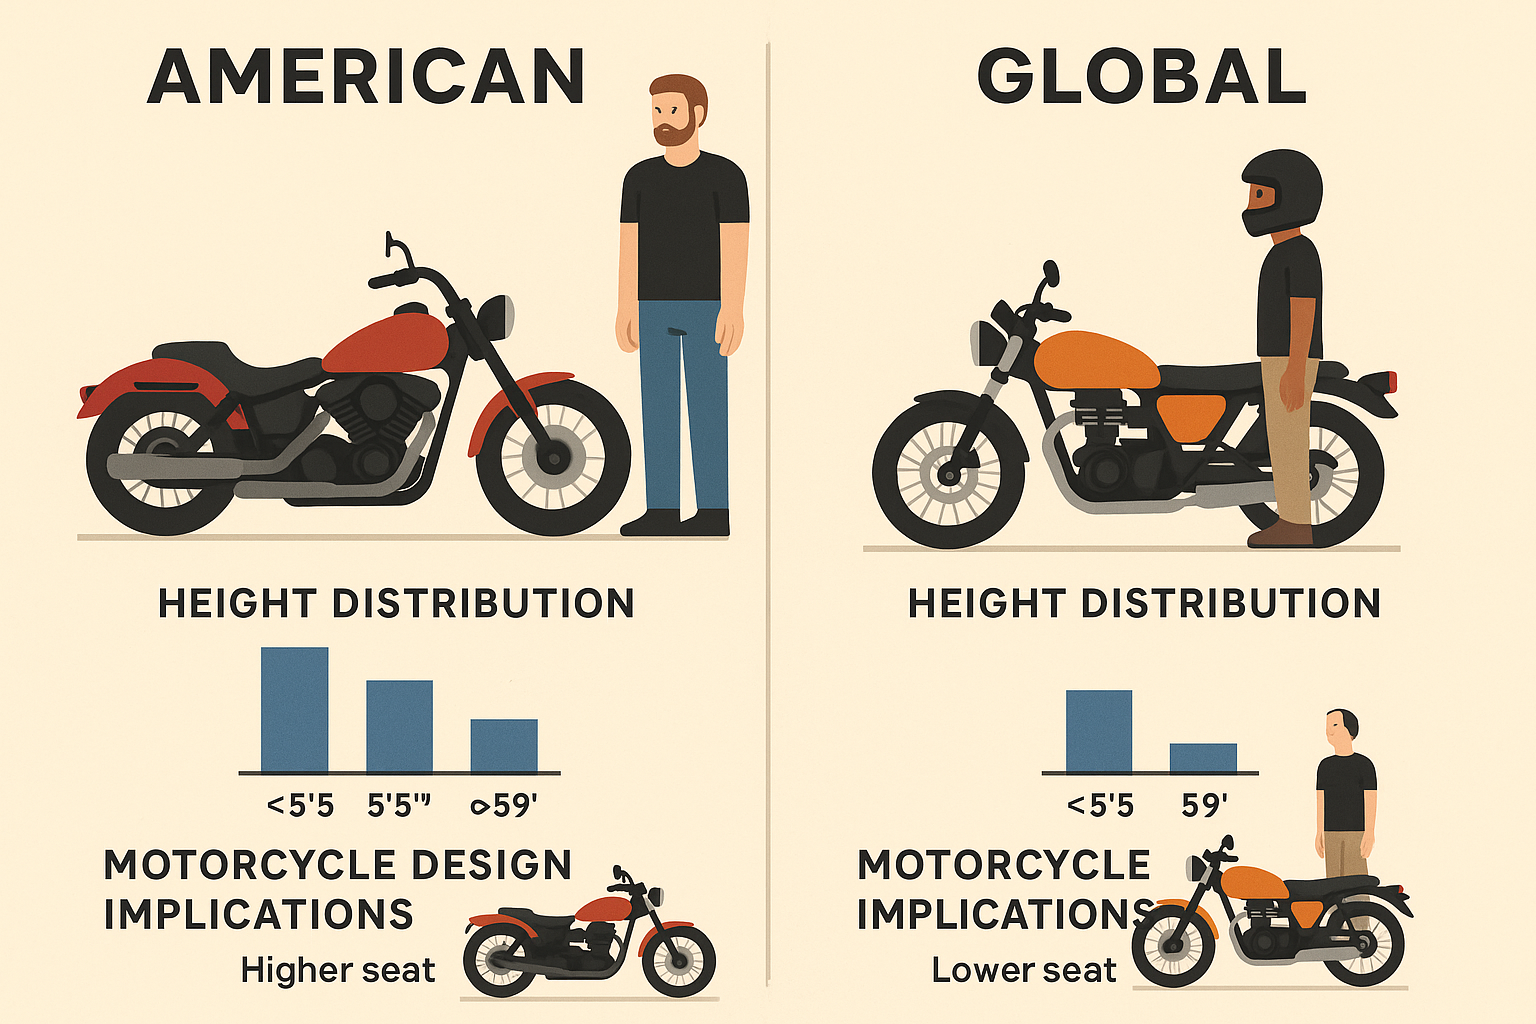
For many riders — especially beginners or shorter riders — seat height can be intimidating.
If you can’t confidently plant your feet at a stoplight, every traffic signal feels stressful. Parking lots become uncomfortable. U-turns feel risky.
Lowering your motorcycle can increase confidence instantly.
But here’s the problem:
Lowering a bike the wrong way can ruin handling, cornering clearance, suspension balance, and even safety.
So how do you lower your motorcycle without destroying performance?
Let’s break it down properly — step by step.
Why Riders Lower Their Motorcycles


4
Common reasons include:
✔ Short inseam length
✔ Heavy bike feels unstable at stops
✔ Touring bikes with tall factory seats
✔ Urban riding with frequent traffic lights
✔ More confidence while learning
Lowering isn’t about ego — it’s about control.
Confidence at low speeds improves overall riding ability.
The Big Warning: Balance Matters
Motorcycles are engineered with specific geometry:
- Rake angle
- Trail
- Suspension travel
- Weight distribution
If you lower only one end of the bike incorrectly, you can:
❌ Reduce cornering clearance
❌ Create unstable steering
❌ Increase bottoming-out risk
❌ Change braking dynamics
The goal is controlled, balanced lowering — not shortcuts.
1️⃣ Start With the Easiest Option: Lower Seat


4
Before touching suspension, try a low-profile seat.
Benefits:
✔ No geometry changes
✔ No suspension compromise
✔ Affordable
✔ Easy to reverse
Options include:
- Factory low seats
- Aftermarket slim seats
- Custom foam shaving
A shaved or reshaped seat can reduce height by 1–2 inches without affecting ride quality.
For many riders, this alone solves the issue.
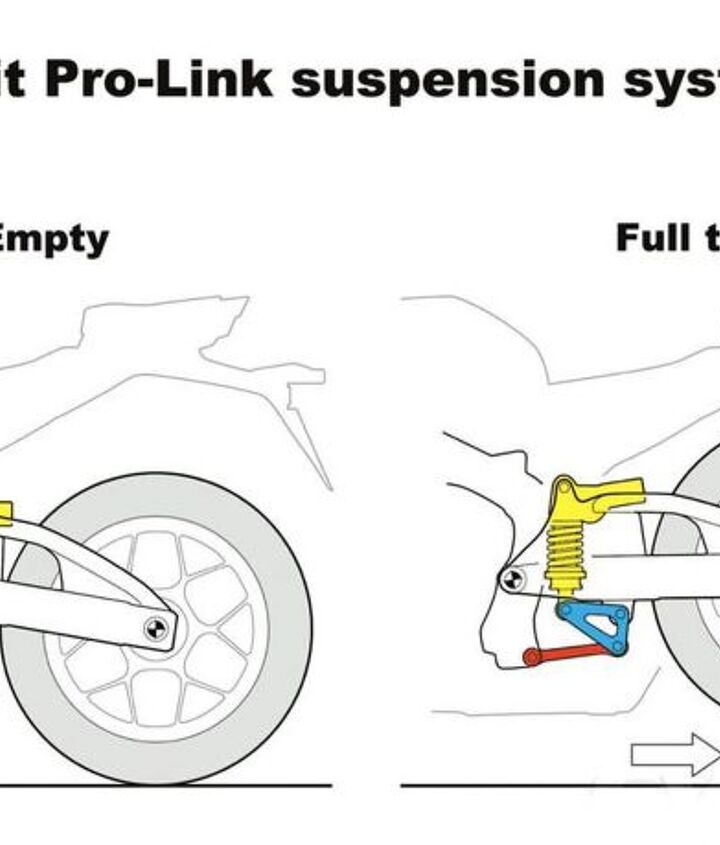
2️⃣ Suspension Lowering Links (Rear Only – Use Carefully)

4
Lowering links replace stock rear suspension linkages to reduce ride height.
Pros:
✔ Affordable
✔ Easy installation
✔ Noticeable drop
Cons:
❌ Changes suspension leverage ratio
❌ Can soften rear suspension
❌ May affect cornering
If you install lowering links:
✔ Reduce height modestly (1 inch max recommended)
✔ Adjust front suspension to match
✔ Retune suspension preload
Never lower rear drastically without addressing front.
3️⃣ Adjusting Front Fork Height

4
You can slightly raise fork tubes in triple clamps to lower the front.
This keeps geometry balanced when rear is lowered.
Important:
- Small adjustments only (5–15mm)
- Professional installation recommended
- Over-adjustment reduces stability
Balance is everything.
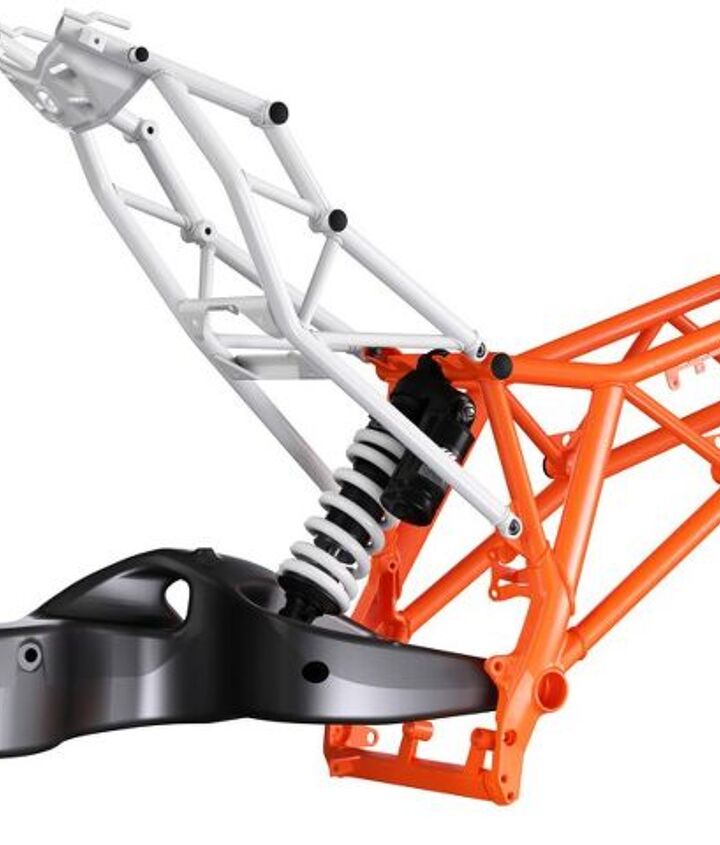
4️⃣ Professional Suspension Lowering Kits
Some motorcycles offer:
✔ Factory lowering kits
✔ Internal suspension shortening
✔ Adjustable suspension systems
These are more expensive — but safer long-term.
Professional internal suspension shortening:
- Maintains spring rates
- Preserves damping quality
- Keeps handling predictable
If budget allows, this is the safest technical solution.
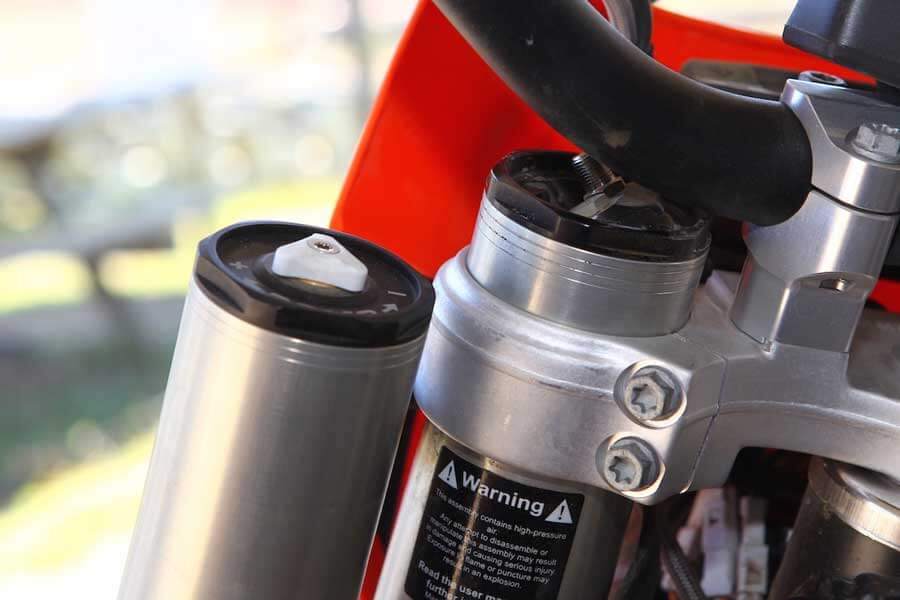
5️⃣ Adjust Suspension Preload (Simple & Often Overlooked)
Before buying parts, check suspension preload.
Reducing preload slightly:
✔ Lowers seat height under rider weight
✔ Improves sag setup
✔ Costs nothing
However, too little preload causes:
❌ Excessive bottoming
❌ Poor handling
Always measure sag properly before making changes.
6️⃣ Shorter Side Stand Required
Lowering your bike changes its lean angle when parked.
After lowering, you may need:
✔ Shortened side stand
✔ Adjustable kickstand
Without this:
❌ Bike stands too upright
❌ Risk of tipping over
Small detail — but important.
7️⃣ How Much Should You Lower?
Safe rule for most bikes:
✔ 0.5 – 1.5 inches maximum
Lowering more than that:
- Reduces ground clearance
- Increases scraping risk in corners
- Changes braking stability
- Impacts suspension travel
If you ride aggressively or corner hard, minimal lowering is safest.
8️⃣ How Lowering Affects Performance
Let’s be honest.
Lowering can affect:
Cornering Clearance
Lower bike = earlier peg scraping.
Suspension Travel
Reduced travel = harsher ride.
Weight Distribution
Improper lowering = unstable handling.
But done correctly and moderately, performance impact is minimal.
The key is balance and moderation.
9️⃣ For Cruiser Riders vs Sport Riders
Cruiser Bikes:
- Often already low
- Lowering usually less problematic
- Designed for relaxed cornering
Sport Bikes:
- Geometry is critical
- Lowering affects lean angle significantly
- More caution required
Adventure Bikes:
- Tall for ground clearance
- Lowering reduces off-road capability
- Choose carefully
Not every motorcycle should be lowered significantly.
🔟 Alternative: Improve Rider Technique
Sometimes lowering isn’t necessary.
Learn techniques like:
✔ One-foot stops
✔ Shifting hips slightly at stops
✔ Planning smooth parking
Many experienced riders manage tall bikes confidently without lowering.
But if confidence remains low — safe lowering is reasonable.
Cost Overview
| Method | Approximate Cost |
|---|---|
| Low Seat | $150 – $500 |
| Lowering Links | $100 – $300 |
| Professional Suspension Lowering | $400 – $1,200 |
| Preload Adjustment | Free |
| Shortened Side Stand | $50 – $150 |
Always factor installation if you’re not doing it yourself.
The Smart Lowering Plan
Here’s the safest order to follow:
1️⃣ Try a low seat
2️⃣ Adjust preload correctly
3️⃣ Install mild lowering links
4️⃣ Adjust front forks slightly
5️⃣ Consider professional suspension work
Never jump straight to extreme lowering.
Final Thoughts
Lowering your motorcycle is not about vanity.
It’s about confidence.
If touching the ground comfortably helps you ride better, then lowering — done correctly — can be one of the smartest modifications you make.
But remember:
Too much lowering sacrifices performance.
Balanced lowering preserves safety.
Lower smart.
Adjust carefully.
And always test ride slowly before pushing limits.
Because the goal isn’t just reaching the ground —
It’s riding confidently every mile after. 🏍️